Server Configuration
When using file-based synchronisation, each IVR service node to which the IVR must synchronise its active set is configured in the IVR GUI through the
Admin page.
To configure the existence of an IVR service node, add the necessary information to the Administration screen:
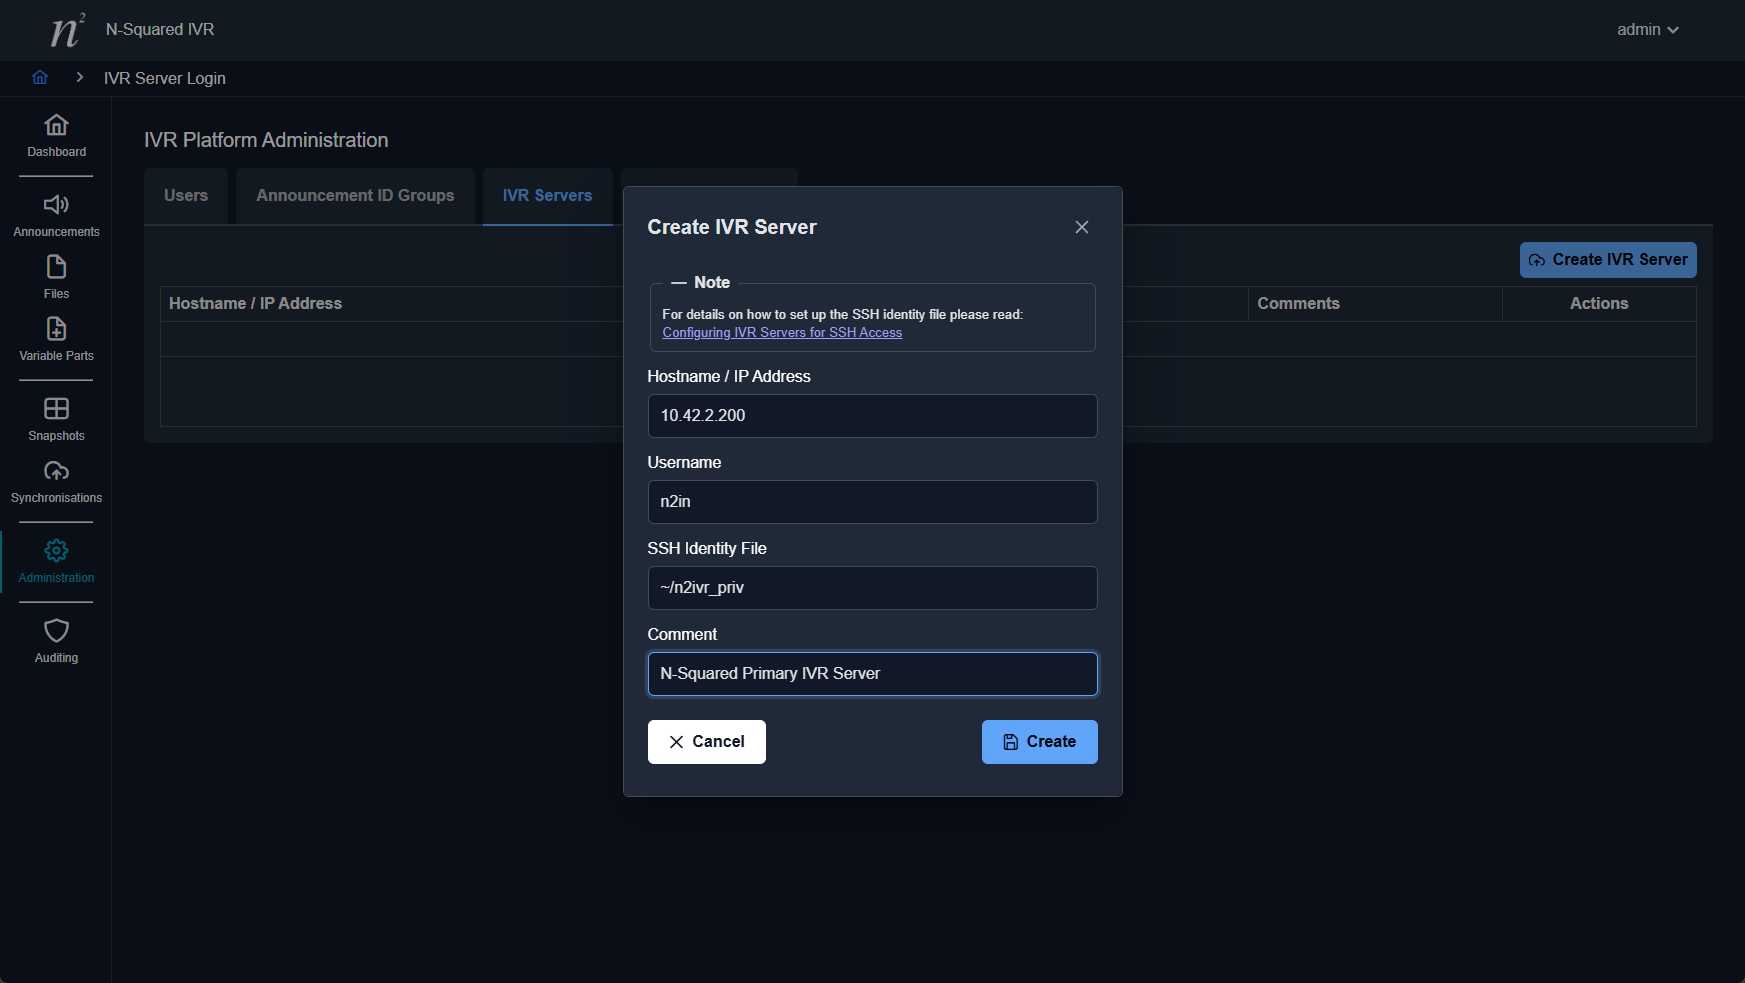
When configuring the IVR service node, the following fields need to be configured:
| Field | Description |
|---|---|
| Hostname/IP Address | The hostname or IP address of the IVR service node. |
| Username | The user to use when connecting to the IVR service node using SSH. This should usually be n2ivr. |
| SSH Identify File | If a unique SSH private key file is to be used for this connection, the full path to this file is required. If this file is not provided, the user that runs the HTTP server process on the server that hosts the IVR management interface is expected to be able to login to the IVR service node using SSH as the specified user without a password. |
| Comment | An optional comment describing the server. |
Prior to configuring an IVR Server in the GUI, passwordless SSH login to the server must be configured.
This is done using a private/public SSH key pair, accessible to the UNIX user that runs the HTTP server process
serving the IVR management interface (for Apache on Linux this will usually be www-data or apache,
depending on the target distribution).
To configure the login for an IVR server, follow these steps:
- Login to the server that hosts the IVR management interface.
- As
rootor a user withsudoaccess, set up the directory where the private key is to be stored, e.g:
sudo mkdir -p /var/lib/n2ivr/etc
cd /var/lib/n2ivr/etc
chmod 755 /var/lib/n2ivr/etc
- Run the following command to create the public and private keys:
sudo ssh-keygen -t rsa
The following example interaction shows the creation. When asked for a passphrase, press enter to give an empty passphrase:
# ssh-keygen -t rsa
Generating public/private rsa key pair.
Enter file in which to save the key (//.ssh/id_rsa): /var/lib/n2ivr/etc/ivr_id_rsa
Enter passphrase (empty for no passphrase):
Enter same passphrase again:
Your identification has been saved in /var/lib/n2ivr/etc/ivr_id_rsa.
Your public key has been saved in /var/lib/n2ivr/etc/ivr_id_rsa.pub.
The key fingerprint is:
c7:39:82:41:ba:2d:3a:53:f8:38:48:e7:7d:64:02:2e root@n2ivr-pri
- Ensure that the private key file can only be read by the user that runs the HTTP server process serving
the IVR management interface (usually
www-dataorapache):
chmod 600 ivr_id_rsa
chown www-data:www-data ivr_id_rsa
- Copy the public key file to a temporary location on the remote IVR server using an account that has SSH login access:
scp /var/lib/n2ivr/etc/ivr_id_rsa.pub root@ivr-server:/var/tmp
- Login to the remote IVR server.
- As
rootcreate a system user for the synchronisation process to use:
user=n2ivr
useradd -d /var/lib/$user -m -r $user
- Make the user’s home directory readable by other users if the audio files are to be synchronised to a directory within the user’s home directory:
chmod 755 /var/lib/$user
- [Optional] Set the system user’s password if you want to enable password-based login too:
passwd $user
- Switch to the system user:
sudo -i -u $user
- Create an
.sshdirectory for the system user:
mkdir .ssh
chmod 700 .ssh
- Add the new key to the
authorized_keysfile:
cat /var/tmp/ivr_id_rsa.pub >> .ssh/authorized_keys
chmod 600 .ssh/authorized_keys
- Switch back to
rootand clean up the temporary public key file:
exit
rm /var/tmp/ivr_id_rsa.pub
- Return to the server hosting the IVR management interface, and test login to the remote IVR server
as the local user that runs the HTTP server process serving the IVR management interface (usually
www-dataorapache):
sudo -u apache ssh -i ivr_id_rsa n2ivr@ivr-server
This may display the following warning:
The authenticity of host 'ivr-server (10.42.2.152)' can't be established.
RSA key fingerprint is 43:e0:5b:fd:5a:cb:02:14:b4:28:ca:6b:2f:90:d0:ee.
Are you sure you want to continue connecting (yes/no)?
If this is displayed, type yes<enter> to continue. There should be no request for any other interaction. In particular, there should be no password request.
You can now configure the IVR server in the administration page. When configuring the IVR server
ensure that the Username field is set to the name of the system user created on the remote IVR
server, and that the SSH Identity File field is set to the path to the private key file created.
Troubleshooting
If the following error occurs:
Failed to add the host to the list of known hosts...
…ensure that the user that runs the HTTP server process serving the IVR management interface owns
an .ssh directory with 700 permissions within their home directory (so that a known_hosts file
can be created).
Check the SSH daemon configuration on the remote IVR server and ensure that the service user is in
the AllowUsers list and/or not in DenyUsers list.
For other SSH connection issues, you can use the ssh -v switch to debug the connection process.